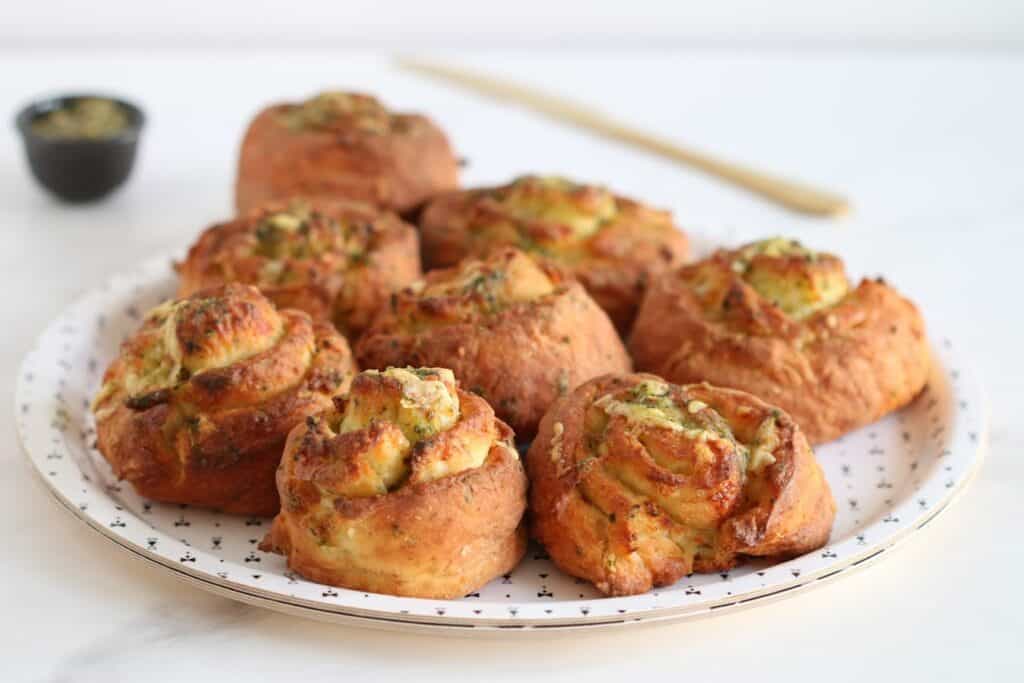
Embark on a culinary adventure with my delectable Garlic Bread Rolls—a heavenly blend of pillowy softness, savory garlic, and a tantalizing mix of Parmesan cheese. This recipe unveils a symphony of flavors and textures, marrying the warmth of freshly baked bread with the aromatic richness of garlic and the savory allure of melted butter.

Home made garlic bread
Usually garlic bread comes as a side dish with your pizza delivery, or as a compensation if the delivery person was late. Either way, this dish is sometimes tastier than the pizza! Or maybe that's just me. In this recipe, I chose to make the garlic bread the star of the meal.
I make these garlic basil buns when we are having a dairy meal and everyone always asks for more. The garlic flavor can be very strong but the basil goes well with it and the outcome is very satisfying. I mean, it has to be if everyone always wants more. You must be doing something right!
If you want to stick to tradition and have the garlic buns with pizza, you can try my sweet potato mini pizzas and create a whole meal for your family.
The recipe is easy as always and it will not take long until your kitchen smells like a bakery or a pizza place.
I hope you like these easy smelly garlic and basil buns!

Tips for Perfect Garlic Bread Rolls:
Fresh Ingredients
Use fresh and high-quality ingredients to enhance the overall flavor of your garlic bread rolls. Freshly minced garlic, good-quality butter, and Parmesan cheese can make a significant difference.
Proper Dough Consistency
Achieving the right consistency for the dough is crucial. Ensure that your dough is well-mixed to create a soft and elastic texture. Adjust the flour or yogurt quantity if needed to achieve the desired consistency.
Flour for Rolling
The dough can be sticky, so use ample flour on your rolling surface to prevent sticking. This makes it easier to roll out the dough into a rectangle without it tearing.
Filling Distribution
When spreading the filling on the rolled-out dough, ensure even distribution. This ensures that each bite has a perfect balance of garlic, butter, basil, and Parmesan.
Swirl Technique
Take your time when rolling the dough into a long string with a swirl in the center. This step determines the characteristic swirl pattern in each roll. A well-executed swirl adds to the visual appeal of the finished product.
Baking Temperature and Time
Preheat your oven to the specified temperature and keep an eye on the rolls while baking. The goal is to achieve a golden-brown color on the rolls, indicating that they are perfectly baked. Be cautious not to overbake, as this can result in a dry texture.
Brushing Technique
When brushing the hot-out-of-the-oven rolls with the remaining garlic and butter mixture, use a gentle hand to ensure an even coat. This step not only adds flavor but also helps keep the rolls moist.
Variations
Feel free to experiment with the recipe. You can add other herbs like parsley or thyme to the filling for additional flavor dimensions. Customizing the recipe to suit your taste preferences can make it your signature garlic bread roll recipe.
Serve Fresh
Garlic bread rolls are best enjoyed fresh out of the oven. However, if you have leftovers, consider reheating them briefly in the oven for that freshly baked taste.

FAQS
Yes, you can prepare the dough in advance and refrigerate it. This allows for a more convenient baking process. When ready to bake, let the dough come to room temperature before proceeding with rolling and filling.
While all-purpose flour is commonly used, you can experiment with different flours like whole wheat or a mix of flours for a unique flavor and texture. Keep in mind that the results may vary.
Yes, you can freeze the unbaked rolls after shaping them. Place them on a baking sheet in the freezer until solid, then transfer them to a freezer bag. When ready to bake, allow them to thaw and rise before baking as directed.
Store leftover garlic bread rolls in an airtight container at room temperature for up to 2 days. For longer storage, freeze them and reheat in the oven when needed.
Absolutely! If you love a stronger garlic flavor, feel free to increase the amount of minced garlic in the filling. Adjust to your personal preference.
If you don't have Greek yogurt, you can use regular yogurt. Greek yogurt tends to be thicker, so you might need to adjust the quantity slightly or strain regular yogurt to thicken it.
Yes, you can adjust the size of the rolls based on your preference. Keep in mind that smaller rolls may require less baking time, while larger rolls may need more time in the oven.
To prevent dryness, avoid overbaking the rolls. Follow the recommended baking time and temperature. Additionally, brushing the rolls with the garlic and butter mixture after baking helps keep them moist.
Yes, you can use dried basil in the filling if fresh basil is not available. Use about one-third of the amount specified for fresh basil.

Other bread and pastry recipes to try:
You must use the category slug, not a URL, in the category field.Other rolls and buns recipes to try are my vegan olive rolls, cottage cheese buns or my honey challah rolls.
Bake these garlic butter bread rolls today!
Whether served as an accompaniment to a hearty meal or relished on its own, these Garlic Bread Rolls are destined to become a staple in your culinary repertoire. So, preheat your oven, roll up your sleeves, and let the aromatic journey begin. After all, every bite is an invitation to savor the blissful fusion of flavors that only homemade garlic bread can offer. Take a roll, revel in the warmth, and delight in the culinary masterpiece you've created.

Garlic Bread Rolls
Ingredients
- 3 cups all-purpose flour
- 1 teaspoon salt
- ¼ teaspoon baking soda
- 1 tablespoon baking powder
- 1¼ cups (400 grams) Greek yogurt
For the filling:
- 4-6 cloves of garlic minced
- 1 stick (100 grams) butter melted
- Few basil leaves chopped
- ½ cup (100 grams) grated parmesan cheese
Instructions
- Set the oven to 200°C / 400°F fan.
- In a bowl, mix all of the bun ingredients to a unify batter.
- On a well-floured surface, (the dough is very sticky) roll the dough to a rectangle shape.
- In a small bowl, mix all the of the filling ingredients.
- Brush the dough with the filling but keep a small amount of the filling for later.
- Roll the dough to a long rolled string with a swirl in the center.
- Cut the roll into buns.
- Place each bun on a baking pan lined with baking paper.
- Bake for 20 minutes until the buns are golden and the cheese is bubbling.
- Take the buns out of the oven while they are still hot, brush them with the remaining filling batter.
- Cool at room temperature.
- Have a roll and enjoy!


Leave a Reply